Correctly maintaining personnel data in the 1C: ZUP program is very important. Otherwise, you will encounter frequent errors in documents and reports, for example when. Many reports from this program are submitted to regulatory authorities and errors are inappropriate here.
In this step-by-step instructions, we will look in detail at the process of hiring an employee in 1C 8.3 ZUP edition 3.1.
In this example, we use a demo version of the program and perform all actions under the account of the head of the HR department. Depending on the rights available to the user, this functionality may be located in a different location or may not be available at all.
Let’s go to the home page and click on the “New Employee” hyperlink.
In the directory card that opens, select an organization.
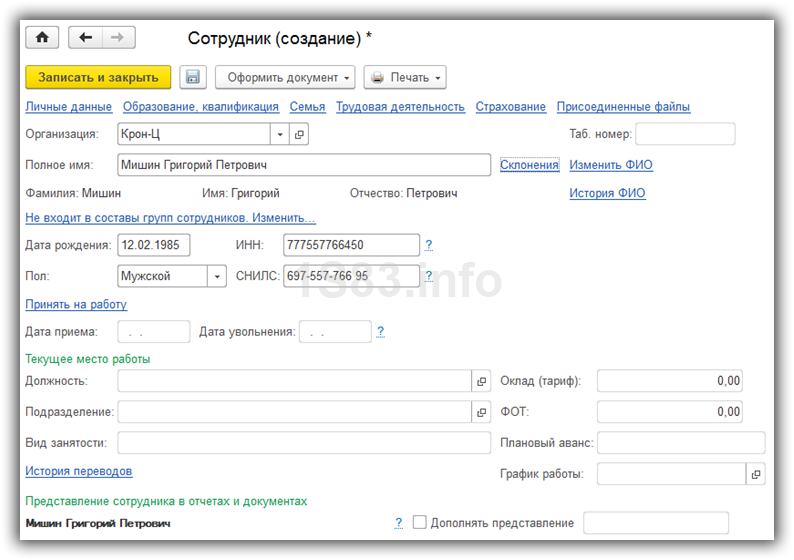
Remember that the program has an algorithm for breaking this field into separate details: last name, first name and patronymic. It separates them from each other by spaces. In the case of a double surname, it must be indicated with a dash without spaces.
There are three hyperlinks to the right of the full name field:


Personal data, information about education, family, work activity, insurance are filled out using the appropriate hyperlinks at the top of the form. If necessary, you can also attach a file to the employee’s card, for example, with his photo or scanned copies of documents.
When you have provided all the required information, click “Save and Close”.

Directory "Individuals"
After creating an employee in the 1C 8.3 ZUP program, a new individual was automatically created. This directory is located in the “Personnel” section.

An individual and an employee are two different things. An individual may not be an employee.
For one element of the directory of individuals, there may be several employees. This is the case because a person can work in a company not only at his main place of work. He may have several contracts, for example, main, part-time and GPC.
This mechanism has been implemented so that, in accordance with personal income tax legislation, the total for all places of work for one individual is considered. The remaining calculations are carried out separately.
For example, an employee works in our organization and this is his main place of work. Also, funds are periodically transferred to him under the GPC agreement. Personal income tax must be calculated in total (summed up for both agreements). Payments will be made separately. The program will have one individual and two employees.
In this regard, it is very important to control the absence of duplicates in the directory of individuals. Otherwise, there may be undesirable consequences with incorrect calculations and with the tax authorities. In addition, tax deductions are tied specifically to the individual.
To avoid these situations when filling out data (for example, TIN) in an employee’s card, if the program finds an individual with the same data, it will issue a corresponding message.

If duplicate individuals appear, contact the program administrator so that he can combine cards with personal data using special processing.
Document "Recruitment"
We have added a new employee to the program. Now we move directly to hiring an employee. You can do this in 1C ZUP 8.3 on the home page, in the employee’s card, or through the “Personnel” menu.
In our example, we will accept an employee from the initial page, since those persons who are not hired are clearly displayed there, which is quite convenient.
To do this, select the created employee in the appropriate table and right-click. In the context menu, select “Apply for a job.”

In the document that opens, some fields are filled in automatically. If necessary, correct them, and also indicate the department and position.
If you fill out, then wages will be substituted from it. Let's go to the appropriate tab. That's right, the accrual was filled out from the staffing position. This data can be corrected.

If you do not maintain a staffing table, the “Payment” tab must be filled out manually.
